Treasured Scrapbooking monthly scrapbook and card kits

Treasured Scrapbooking

Monthly Kits and Much More

Showing posts with label tips and tricks. Show all posts
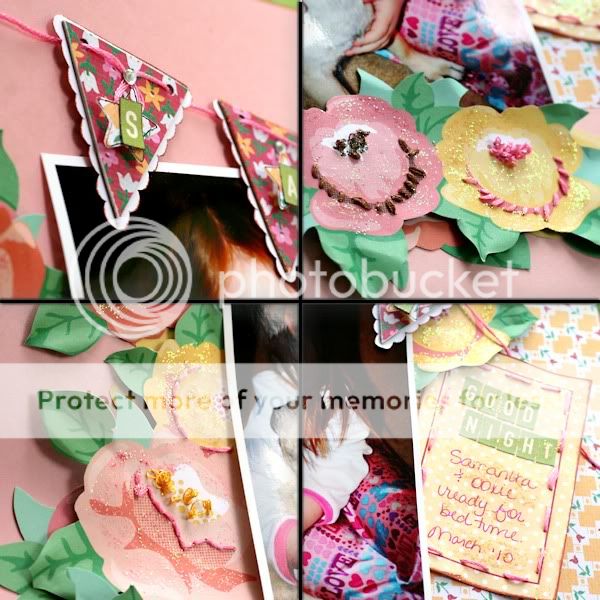
In the gorgeous May kit this month was a sheet of American Craft paper from the dear Lizzy line I fell in love with. There are oodles of cute flowers begging to be cut out. There are lovely on their own, but I decided to dress mine up with some thread and stickles. This takes about 5 minutes and its super easy.
What you will need:
Scissors
Flowers cut from AC dear Lizzy paper
Stickles
Paint Brush
Tape
Threaded Needle
Cut your flower from the AC dear Lizzy paper
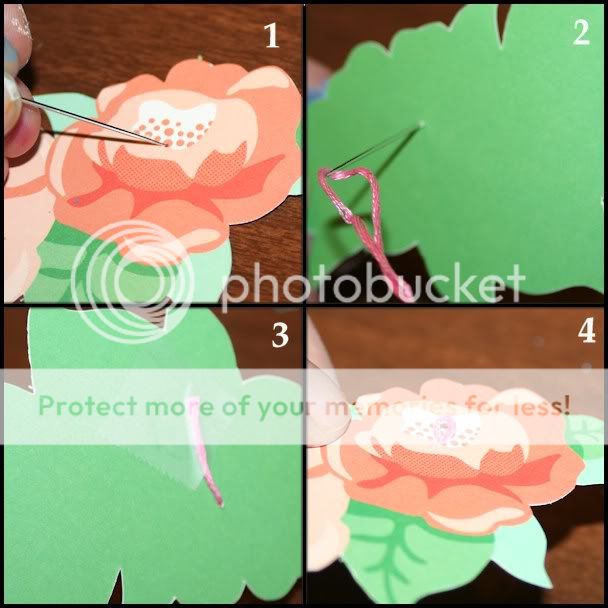
1. With your needle, poke a hole at the bottom edge of one of the little circles.
2. Turn over flower (backside) and thread your needle through the hole, leaving a little tail on the back.
3. Tape down the tail and turn flower back over (front side)
4. Leaving a 1/16 space, thread needle to the back of the flower, being careful not to pull the thread tight leaving a little loop on the top of the flower
(click photo to view larger)
5. Keep repeating until your flower is filled with as many little loops as you like. Trim thread and secure to the back with tape.
6. With your paintbrush in hand, squeeze a line of stickles on the end of the paintbrush
7. Paint the stickles all over your flower, the loops take the stickles well too, so be generous with this step.
8. Allow stickles to dry, shape leaves and flowers if you’d like, and you have a pretty dressed up flower.
 You can use these same techniques to enhance your journal die cuts too.
Hope you have a happy scrappy day!
Don't forget, today is reveal day AND the May card kit is in the store!
xoxo,
Leah
Comments: (4)
Good day y'all.
Last night I was looking at my ribbon rack and noticed I had yards of the really thin ribbon, you know the kind.. the 1/8" wide stuff you can buy at your local Michael's or Joannes. I bought it several years ago when I first started to scrapbook.. and it's pretty much been untouched since then. Now that I know my style of scrapbooking (lumpy and bumpy) it doesn't sit well with me to just adhere a flat piece of ribbon down. There's no ooomph to it. So, I decided to braid it.
Start off with 3 pieces about 14" long. (or however long you wish it to be)

Grab all three pieces of ribbon, and tie a knot.
After I tied a knot, I used a piece of scotch tape to adhere my knot to my desk
(the ribbon taped to the ruler didn't work out so well, it kept moving.. lol)
Then braid.
Once you get to the end, just put another knot to keep the braids from coming undone.
I then adhered this strand to a card we'll be sending to the children's papaw in Ky.
*b missing you*
I just love the bit of texture and visual interest this adds.
This fabulous bee paper came in the April TS kit.
I know I am long winded... but one more cool tip, and this one is my favorite.
If you do not like braiding... try using your crochet hook. In the photos, I was using a G hook.

Start by creating a slip knot with one strand of ribbon.
Then just chain stitch. (this link takes you to a video)
Both methods are really quick and easy... you can do it in front of the tv at night.
.. and here's an example layout of the crocheted ribbon I used on a layout last month for Julie's monochromatic green challenge.
Let us see your projects by commenting here, or uploading into the Treasured Scrapbooking gallery!
xoxo
Leah